It can seem tricky to figure out how to fold a cloth diaper, but with a little bit of practice, it becomes easy and natural. If you get the hang of it, you’ll find that prefolds can be an affordable and durable cloth diapering system.
Fastening a prefold can help with keeping BM’s off your diaper covers and is more versatile than just laying the diaper in a wrap. If you fold and fasten your diapers, you can use pull-on or side-snap covers. Or, you can let your baby run around coverless if they are prone to diaper rashes. The folds I’ve found to be the best are the angel wing fold, the newspaper fold, and the bikini twist.
Angel wing cloth diaper fold
This is my favorite cloth diaper fold. It’s similar to the newspaper fold (see below), but you don’t have to decide ahead of time how much diaper to fold down at the top. For reference, this is a regular (4x6x4) unbleached Chinese prefold, Isaac is 8.5 months old, about 18-19 pounds.
Start by laying the prefold under your baby with the back lined up with their navel. Then fold the front of the diaper in thirds, leaving it open in the back so you can bring the wings around to pin.

Bring the front up between baby’s legs and pull it snug.

Next, fold the excess under. Again, I like the diaper to fit below the navel.

Bring one corner of the diaper around and pin, then do the other. I swear I can do this faster than finding the right snaps on a fitted diaper and fastening them. I prefer pins to snappis at this age because he’s so mobile and he’s getting to the end of the fit range of the diaper. A diaper that is pinned right at the corners is much more secure than a snappi that’s barely hanging on to the edges.
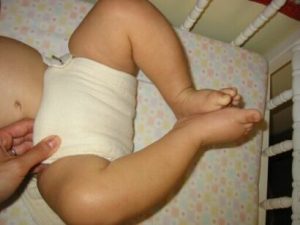

Here’s a picture of the little gusset that’s formed at the thigh:

Then pull on a cover and you’re all done. Happy baby 🙂

Newspaper cloth diaper fold
Short of using a tranquilizer gun, I couldn’t get either of my kids to stay still enough to get clear pictures of the first part of some of these cloth diaper folds, so I’ve used a much more cooperative and furry model. The first thing to do is lay the prefold flat under the baby, with the back edge lining up with their navel. Then fold a few inches of the front of the diaper up. The amount you fold up depends on the size of your baby and how you want the diaper to fit. I prefer sort of a bikini fit that goes under their belly buttons. I find that the diaper stays up better this way.
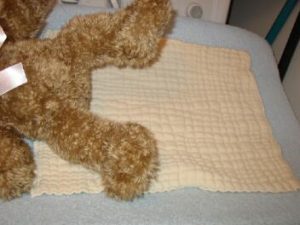
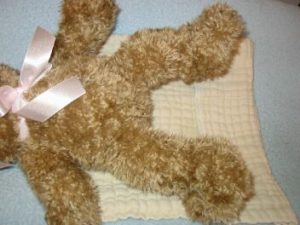
Fold one side of the diaper over, then the other, tucking the second side into the pocket formed by the first fold (this is obviously where pictures make all the difference)
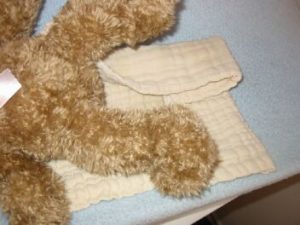
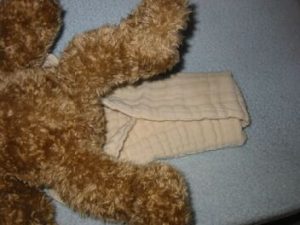
Now bring the center portion of the diaper up between the legs and pull it up nice and snug.

Pull one corner around from the back, and then the other, holding both down while you look for that darn snappi. Hook one side of the snappi, then pull it over to the other. Finally, pull the bottom hook down to grab the center portion of the diaper. If you’re pinning, this is actually a little easier, because you can pull one corner over and pin it before you deal with the other corner. You don’t have to go through all the layers of the diaper when you’re pinning. Just catch the top layer and some portion of the bottom layer (see Julia’s diaper pics for an example of a pinned, newspaper folded diaper).
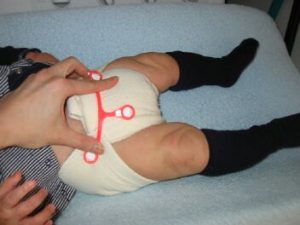
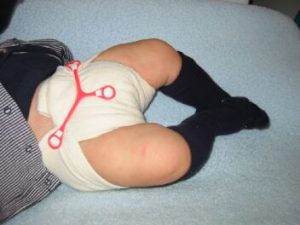
You’ll get a much more secure fit if you start the prefold high (navel level) in the back, then wrap the corners around your baby’s hips and back down towards the front. I hope that makes sense.
Bikini Twist cloth diaper fold
This cloth diaper fold is supposedly better for babies with chunky thighs. It’s never been my favorite because poop gets in all the creases of the folds and the twisting makes scraping poo into the toilet kind of complicated. However, a lot of people like it because it’s trim between the legs and they claim that the ‘poop pocket’ that’s formed can even keep in breastfed poop.
To start, lay the prefold under your baby with the back lined up with their navel. Then twist the front of the diaper.
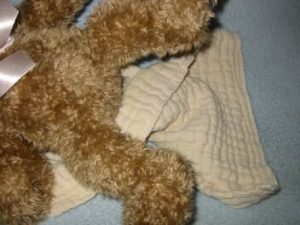
Bring the diaper up between baby’s legs and fold it down below their belly button.

Next, bring the back corners around to the front. Remember, for a good snug fit, the diaper should start high in the back, then wrap around lower to the front.
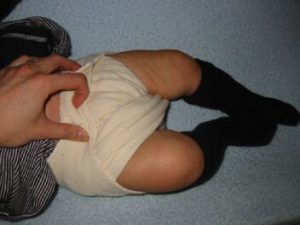
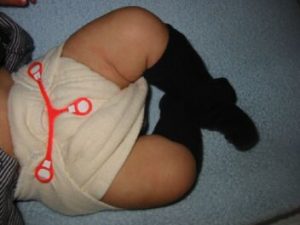
Snappi each corner, then pull the third snappi leg down to catch the center portion of the diaper and you’re done 🙂 .
One last tip…
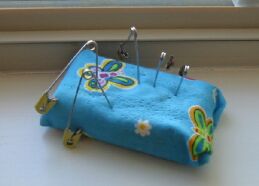
One other little tip: I covered a bar of soap with a pretty piece of fabric and use this as a pincushion for my diaper pins. This keeps them handy and the soap ensures that the pins slide easily through the diapers.
